

(The following is an excerpt from the forthcoming Tantravaya Yoga book by Shy Sayar, original article copyright 2016, Yehoshua (Shy) Sayar, all rights reserved. For a complete 6-hour video course on the 8 Principles with anatomy images, visit YogaU Online)
Over many years of study and practice in yoga and other forms of movement, I have observed eight internal actions that help every body in every posture and movement achieve greater stability, mobility and ease. I have organized these into four pairs of oppositional actions, such that the two actions in each pair balance each other out. Thus we honor any differences between bodies, as well as the different demands of each physical gesture. Every body will need a unique balance of each action within each pair, and every posture and movement will demand more or less emphasis on each action within each pair. Moreover, I have organized the actions into two oppositional pairs in the lower body, and two in the upper body that perfectly mirror those in the lower body. This elegant balance facilitates learning and retention as we habituate the body in the principle actions, and reflects the beauty of the body’s architecture.
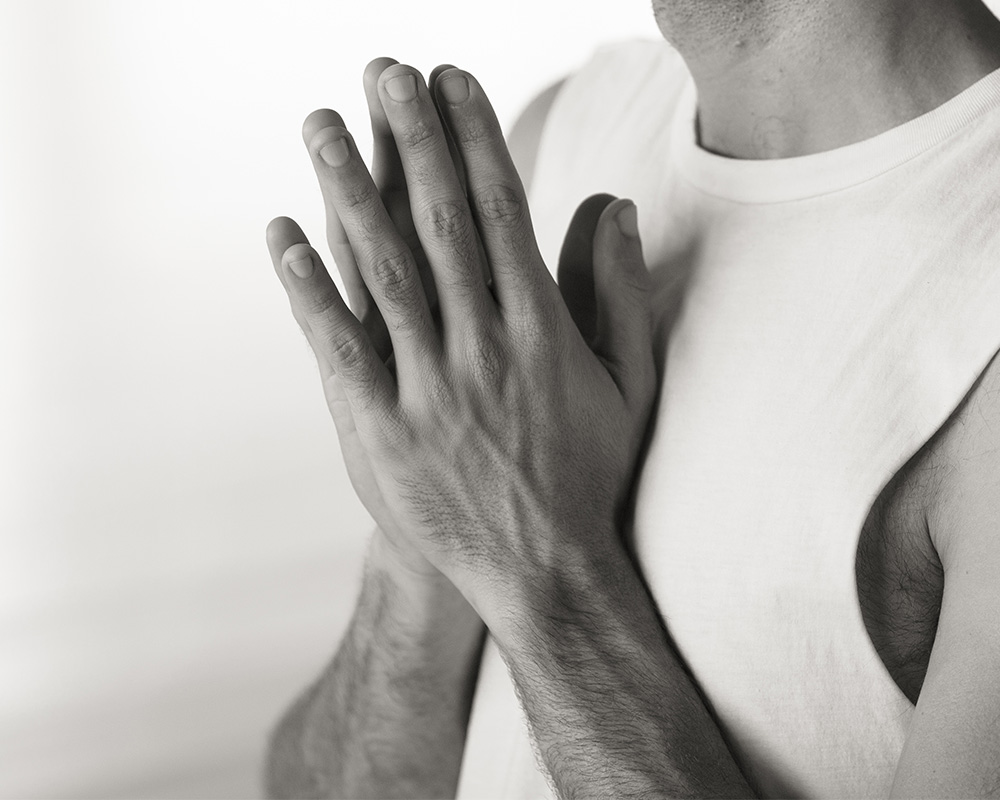
Principle V: Draw the Floating Ribs Back Towards the Spine
This first principle action of the upper body aims to protect arguably the most frequently abused part of the spine: the TL Junction. TL stands for Thoraco-Lumbar, referring to the backwards curve of the upper back (thoracic kyphosis) and the forward curve of the lower back (lumbar lordosis). The thoracic spine has 12 vertebrae (spine bones), and the lumbar spine has 5. The TL Junction refers to the joint where the thorax meets the lumbar, between the 12th (lowest) thoracic vertebra and the 1st (uppermost) lumbar vertebra. Thus it is also known as joint T12-L1.
Where these spinal curvatures meet, the form a naturally mobile joint. Most people will find it much easier to move each spinal curvature as one unit, at its meeting point with the other curvature, then to articulate any individual joint within a given curvature. Thus we tend to abuse the mobility of the TL Juncture, over time rendering it increasingly unstable. By doing so we also routinely rob the other thoracic and lumbar joints from movement, rendering them gradually more dry and stiff. This problem obviously perpetuates itself.
The way that we most commonly abuse the mobility of the TL Junction involves sticking the front tips of the floating ribs out in front of the torso. We have 12 ribs, each attaching in the back to one of the 12 thoracic vertebrae. The upper 10 ribs on each side also attach in the front to the breastbone. The lower two ribs on each side do not attach to the breastbone, hence we call them the floating ribs. The 12th, lowest ribs attach in the back to the 12th thoracic vertebra. Thus sticking the floating ribs out articulates the 12th thoracic vertebra with the 1st lumbar vertebra, mobilizing the TL Junction.
Mobilizing the TL Junction offer great temptation to shape-oriented movers and to others unconscious of its detrimental effects. When we stick the floating ribs out, we can usually bend farther into a given shape. Yet, the cost remains high: over time we cause increasing instability in the TL Junction and immobility in other thoracic and lumbar joints.
If you look at many magazine images of the cobra pose, you will often notice that the model’s spine does not curve evenly, at a consistent degree of extension throughout the spine. Often you will notice a point in the middle back where the curve sharpens upwards: the TL Junction. The obsession in modern yoga with bending forward with a flat lower back also involves this same mistake. Reaching the floating ribs forward in, for example, the seated forward bend, we can bring the head closer to the feet. Yet, when the practitioner relaxes the torso down towards the legs, you will usually see that the spine does not curve evenly, at a consistent degree of flexion throughout the spine. Instead, the upper back will often round more than the lower back, starting precisely at – you guessed it – the TL Junction. Aggressively deep twists, or side bends such as the triangle pose, frequently involve sticking the lower ribs forward and arching the middle back with uninformed practitioners. At a close look, these mistakes prove ubiquitous, in yoga and beyond.
Thankfully, the solution proves equally simple: draw the floating ribs back towards the spine. This first principle action of the upper body stabilizes the TL Junction and encourages joint movement within the lumbar and thoracic curvatures themselves. When we draw the floating ribs back before and during a backbend, for example, we place greater demand for activation on the hamstrings to pull the sit bones down towards the back of the knees, and on the abdominal muscles to stabilize the lumbar spine. We then also demand more extension at the thoracic spine, which needs and benefits most from extension due to its natural kyphosis, our habits of slouching over screens and car wheels, and its bound position within the rib cage. The same is true in forward bends, twists and side bends. Movement in all planes demands core stability and thoracic extension. Even forward bends benefit from lengthening the upper back by extending it forward, as long as we mobilize the actual thoracic vertebrae, rather than just the TL Junction.
Thus, though perhaps the easiest action to feel of all the principle actions, stabilizing the TL Junction by drawing the floating ribs back towards the spine demands increased muscular action. It also requires great discipline to mobilize the body through principle actions rather than pushing into shapes via hypermobility at places of spinal curvature change. The other vulnerable place of curvature change in the spine, the Cervicothoracic Junction where the neck meets the upper back at joint C7-T1, gets its stability from the next principle action of lifting the bones behind the ears. Pulling the floating ribs in also provides the solid foundation from which lifting the bones behind the ears will help us open the chest and extend the upper back.
Principle VI: Lift the Bones Behind the Ears
We have seen how drawing the floating ribs in stabilizes the TL Junction and encourages muscular activation through the principles of movement to create good mobility throughout the spine. We have also seen how lifting the lower belly and sending the sit bones towards the back of the knees lengthens and stabilizes the lower back. Lifting the bones behind the ears helps protect the other vulnerable arch in the spine: the neck. Both the lower back and the neck naturally arch forward (in lordosis). The ilium bones of the pelvis bind the sacrum within the pelvic bowl, and the ribcage surrounds and binds the thoracic spine in the upper back, but both the lower back and the neck remain relatively free. As such, they have greater mobility, but lesser stability. Thus it is important to stabilize both with principle actions for optimal posture and movement.
In order to lengthen and stabilize the neck, we must lift the skull off of the spine. The most effective location into which to direct this lifting action is where the skull meets the spine. Ask most people to point to where the skull meets the spine and they will point to the base of the skull. Yet, observe any image of the human skeleton and you will find that the base of the skull is far behind the top of the spine. A more accurate approximation from the outside would be at the bones behind the ears, where the skull also meets the jaw. Lifting from here most effectively lengthens and stabilizes the neck, since it pulls up on the spine, as well as the skull.
Where the skull meets the jaw (the mastoid process) is also an attachment of the SCM (sterno-clydo-mastoid) muscles that connect the mastoid process to the breast bone (sternum) and collarbones (clavicles). In most people, tightness in the SCM pulls the mastoid process down and forward towards the chest, lifting the chin and tightening the neck. When we lift the bones behind the ears, we lengthen the SCM, encouraging instead an effortless lift in the chest, as well as length and stability in the neck. Thus, you know that you are performing this sixth principle action of lifting the bones behind the ears correctly when you not only feel length and stability in the neck, but also a brightening and effortless lift in the chest.
To trigger the action of this sixth principle most simply, you can imagine sliding the back of your head up an imaginary wall. Even better if you can imagine someone pulling straight up on pigtails behind your ears, as this will more directly lengthen the SCM muscles. Let us be sure that we do not misunderstand this action to mean lifting the chin, which in many ways will achieve the opposite of our desired result. Lifting the chin actually shortens the neck and tightens the SCM. Hence, for example, we want to avoid looking up in the cobra pose, unless our extension back bend in the upper back is so strong that the front of the chest looks upwards, too. As a general rule, let your gaze follow your heart: point your nose where the front of your chest points.
In prone poses, where you are facing down towards the ground, such as in the plank pose or on all fours, it can be useful to think of lifting the throat into the neck without sticking the chin forward.
Jalandhara Bandha
Taken together, pulling the floating ribs in and lifting the bones behind the ears give us jalandhara bandha, a supportive arch lift in the roof of the mouth, just under the very center of the skull. As we will see in Part III: The Subtle Body, jalandhara bandha relates to the pineal third-eye chakra. It functions as a kind of roof for the circulation of energy in the torso, and thus provides an upper companion to the root arch of mula bandha. Physiologically, jalandhara bandha stabilizes the neck and facilitates mobility in the upper back and shoulders that in turn allows the chest to open. The two actions in this first pair of principle actions at the upper body accommodate jalandhara bandha and help to set the ground for both literal and figurative heart opening. What remains for us to explore with the next pair of principle actions is how to properly use the hands and arms, in all physical gestures and especially when bearing weight on the hands. The proper actions of the arms and hands will also help us keep the shoulder blades widely apart in all gestures, ensuring that we can open the entire heart, front and back.
Principal VII: Press Through the Thumbs & the Roots of the Index Fingers
We saw in the very first principle how pressing through the balls of the big toes helps us properly activate the feet and the lower legs, with benefits echoing up all the way into the lower back and beyond. Similarly, pressing through the thumbs and the roots of the index fingers helps us properly activate the forearms, with benefits echoing into the upper back, shoulders and neck.
Come onto hands and knees, with the wrists under the armpits and parallel to the front of your mat or to a wall in front of you. Comfortably spread the fingers apart without creating much tension, and gently grip the ground with all of the fingertips. Now press the thumbs and the roots of the index fingers into the ground until the outer hands begin to feel lighter. You will find that the forearms engage, and that the shoulder blades move away from each other, opening the back of the chest. The same results occur when you stand with the arms long at your sides, such as in the mountain pose, and press the inner hands into an imaginary resistance, just slightly away from your sides. Before we observe how the effects of this action interact with the other principle actions, as well as how to balance it with its oppositional action in the next principle, let us discuss the reasons for the positioning cues I have offered for the hands. This will also help us understand how the structure of the hands and forearms facilitates and benefits from the effects of this principle action.
Like the tibia and fibula in the lower leg, the forearm contains two bones: the radius and the ulna. The radius terminates at the thumb side of the wrist, and the ulna at the little finger side of the wrist. If you hold one arm in front of you in supination, with the palm facing upwards, the radius runs from the outer elbow to the thumb side of the wrist, and the ulna runs parallel to the radius, from the inner elbow to the little finger side of the wrist. Now hold the elbow with your hand, thumb on the inner elbow and fingers on the outer elbow. Turn your extended palm down towards the ground. You will observe that the wrist has flipped, with the radial side now inner and the ulnar side outer. Yet, the elbow did not flip. You have just observe how the radius crosses over the ulna like an X shape when we pronate, turning the palms down.
To facilitate this capacity of the forearm, the radius and ulna taper in opposite directions: the radius become more massive closer to the wrist, while the ulna becomes more massive closer to the elbow. This tapering shape allows the radius to cross over the ulna in rotation. Because the radius is more massive at the wrist, it is particularly important to avoid turning the wrists towards each other when bearing weight on the hands. If the creases of the wrist face towards each other instead of forward when we bear weight on the hands, we call this Radial Deviation. Because the radius is more massive than the ulna at the wrist, the thumb side of the wrist has less space than the little finger side of the wrist, rendering it more vulnerable to excessive compression. Radial deviation during weight bearing on the hands compresses the more vulnerable thumb side of the wrist and can create pain and injury through repetitive strain.
Comfortably spreading the fingers without creating unnecessary tension takes some pressure off of the wrists by distributing weight more evenly across the whole hand. Gently gripping the ground with the fingertips further eases the wrists by shifting pressure more onto the fingertips. Yet, making sure that the creases of the wrists face forward and never in towards each other most effectively protects the wrists from strain by avoiding pressure on the more vulnerable thumb side of the wrist from radial deviation during weight bearing on the hands. The cue to place the creases of the wrists parallel to the front of a yoga mat, or to a wall in front of us, can help us understand and apply this safe and effective positioning. In some bodies this will mean that the index fingers will point forward, in others the middle fingers, and others yet will find it somewhere in between. Instead of trying to create a universal principle where there is none by cuing the position of the fingers, we can honor individual structure differences while still bringing every body to a safe and effective position by cuing the creases of the wrists to face forward, never in.
Placing our hands on the ground in pronation required activation in a specialized group of muscles, the pronators of the forearm. Yet, even when we are not bearing weight on the hands, such as when we stand in the mountain pose, we can trigger the action of these muscles by pressing the inner hands into an imaginary resistance. When the arms are overhead, for example, we can trigger this principle action by pressing the thumbs and the roots of the index fingers into an imaginary block between the hands. Now, with the last principle action, which is the oppositional partner of this action, we can complete our review of the eight principles and study the beneficial effects of the productive opposition between these last two principle actions, as well as between this pair and the other pairs.
Principle VIII: Turn the Upper Arms Out and Away from Each Other
To complete the final pair of principle actions, as well as the whole 8-principle activation system, we now turn to the action of the upper arms and shoulder blades. Reach your arms forward at shoulder height with the palms facing down. Press the thumbs and the roots of the index fingers down into imaginary resistance, creating isometric engagement in the forearms. Then, without turning the wrists towards each other, turn the upper arms out and away from each other, as though trying to turn the armpit in towards each other. If you do not let the wrists turn towards each other as you turn the upper arms out, the arms will hardly move at all in response to this outward rotation action. However, even without much external movement, the internal action of turning the upper arms out will trigger activation in the muscles of the upper arm and, most importantly, in the serratus anterior muscles at the sides of the rib cage.
The serratus anterior has 9 bands of muscle that run from the shoulder blades out and slightly down onto the sides of the rib cage. When we engage the serratus anterior without allowing the floating ribs to move forwards (cf. Principle V), these muscle heads pull the shoulder blades away from each other and slightly down and forward, towards the underside of the armpits. This three dimensional movement across all physical planes stabilizes the whole shoulder girdle, opens the back of the chest without closing the front, and releases tension in the neck.
The serratus anterior muscles work in conjunction with their primary antagonists, the rhomboids that connect the shoulder blades to the spine, to stabilize the shoulder blades over the upper back. Practitioners often overuse the rhomboids by drawing the shoulder blades towards each other. This error often accompanies the mistake of sticking the floating ribs forward. The temptation here arises from the fact that drawing the shoulder blades towards each other, especially in conjunction with sticking the floating ribs forward, can indeed relieve the pressure on the neck that comes from rounded shoulders and hunching in the upper back. Aside from the problems with abusing the mobility of the TL Junction that we have already discussed, this tempting relief also comes at the price of creating tight rhomboids. This can in turn lead to other problematic posture compensations, as well as to stiffness and pain in the upper back. Hence I do not recommend the common and unnecessarily aggressive instruction to pull or roll the shoulders actively back and down, an action that can close the back of the heart physically as well as energetically. Instead, we can use the serratus anterior to trigger broadening in the shoulders and the collarbones, opening space to lengthen the neck without tightening the upper back.
In addition to balancing the rhomboids by drawing the shoulder blades away from each other, serratus anterior can relieve pressure on the neck because it also draws the shoulder blades down towards the underside of the armpits. As a result of this aspect of its three dimensional action, serratus anterior pulls the shoulders away from the ears and balances such commonly tight muscles as the levator scapulae and upper trapezius in the ridges of the shoulders and the neck. When the muscles in the ridges of the shoulders and the neck relax and lengthen, the shoulders naturally and effortlessly open back and down. This movement facilitates our ability to lift the bones behind the ears, as in Principle VI. Then we can lengthen the neck and open the heart without unnecessary effort or tightness in the shoulders and upper back.
The collaboration between Principles VII and VIII effectively activates the serratus anterior to create all these wonderful benefits in the whole upper body. Come back to the position above with the arms forward and the palms facing down towards the ground. This time also bend the elbows out a little, keeping them up at chest height. Again press the inner hands down into an imaginary resistance to create isometric activation in the forearms. Now also pretend that you are pressing the elbows down into imaginary resistance. This is another way to trigger the internal principle action of turning the upper arms out and away from each other without changing at the wrists, and thus to activate serratus anterior.
In the same position, take one hand and touch the outer rib cage on the opposite side, while still pressing the inner hand and elbow of the opposite arm down into imaginary resistance. You should feel a large and vertical band of muscle, the latissimus dorsi. Just in front of these lats and deep to them you can find the serratus anterior. Actively pull the shoulder blades away from each other and roll them down as though under the armpits (without sticking the floating ribs forward) to help you feel the serratus anterior even more. Do this again with both arms, and you should notice that the upper back and shoulders feel more stable and broad, and that this facilitates lifting the back of the head to create more length in the neck.
Now come back onto the hands and knees, with the wrists under the armpits and the creases of the wrists facing straight forward, not in towards each other. Look down at your thumbs and lift the throat up into the back of the neck. Lift the floating ribs into the mid back, creating more space between the shoulder blades. Also lift the lower belly into the lower back, and press the upper thighs back without moving the buttocks or losing the lift in the lower belly. Comfortably spread the fingertips and gently press them into the ground. Press the thumbs and the roots of the index fingers down into the ground, as though pressing the palms towards each other without actually moving them closer together. Keep the elbows straight but soft, without locking or hyperextending. Then, keeping the pressure into the inner hands, turn the upper arms out and away from each other, as though trying to make the armpits turn to look towards each other. If you keep all the principle actions described here while turning the upper arms out, you should feel the serratus anterior activate to create space and stability across the upper back and shoulders, while the whole spine remains long and supple.
Hasta Bandha
The combined actions of pressing through the inner hands and turning the upper arms out gives us hasta bandha, a supportive arching lift in the palms of the hand. Hasta bandha increases stability and helps protect the wrists, elbows and shoulders, especially when bearing weight on the hands. It also encourages energy flow through the arms, into and out of the heart center, in any posture and movement. Hasta bandha mirrors pada bandha in the feet, as both join mula and jalandhara bandha through the eight principles to support stability and energy flow throughout the body.
Integration
Come to standing with the feet parallel to each other, heels directly under the sit bones. Comfortably spread the toes and press the balls of the big toes down, without gripping the ground with the toes themselves. Keep the pressure onto the inner feet and lift the inner thighs up and away from each other, without tightening the buttocks. Press the upper thighs back in the hip socket until the pelvis rests above the ankles and you can feel some weight in the heels. Then lift the lower belly, keeping the upper thighs back.
Draw the floating ribs back towards the spine and lift the bones behind the ears to lengthen the neck and create an effortless lift and widening in the chest. With the arms straight and long at your sides, press the inner hands into an imaginary resistance slightly away from the sides of your hips or thighs. Lastly, keep the shoulder blades wide across the upper back and turn the upper arms out without changing the position of the wrists. Breathe through the strong and stable spaciousness of the whole body in this ultimate tadasana, the mountain pose, by the power of all eight principles.
If you bring your arms overhead with the palms facing each other in padahastasana, the gesture will demand more effort to keep the thighs back and the hips above the ankles, as well as to keep the floating ribs back towards the spine. Principle VIII here still involves turning the armpits towards each other; even if it might now feel like you are turning the upper arms towards each other, anatomically you are still performing lateral rotation of the upper arm. Extending the upper back in a standing back band from here will demand more lift in the lower belly to protect the lower back, with even more emphasis on reaching the sit bones down towards the back of the knees to trigger this lift in the lower belly and protect the lower back. Every pose henceforth will be an exploration of the right balance within the pairs of principle actions, as well as between the different pairs. We can now explore any physical gesture and movement with the safe and skillful foundation of the eight principles.