(The following is an excerpt from the forthcoming Tantravaya Yoga book by Shy Sayar, original article copyright 2016, Yehoshua (Shy) Sayar, all rights reserved. For a complete 6-hour video course on the 8 Principles with anatomy images, visit YogaU Online)
Over many years of study and practice in yoga and other forms of movement, I have observed eight internal actions that help every body in every posture and movement achieve greater stability, mobility and ease. I have organized these into four pairs of oppositional actions, such that the two actions in each pair balance each other out. Thus we honor any differences between bodies, as well as the different demands of each physical gesture. Every body will need a unique balance of each action within each pair, and every posture and movement will demand more or less emphasis on each action within each pair. Moreover, I have organized the actions into two oppositional pairs in the lower body, and two in the upper body that perfectly mirror those in the lower body. This elegant balance facilitates learning and retention as we habituate the body in the principle actions, and reflects the beauty of the body’s architecture.
Principle l: Reach Through the Heels and the Balls of the Big Toes
In order to properly activate the muscles of the lower body, we must first properly activate the feet. If we flex the feet we encourage contraction in the muscles on the fronts of the legs, while pointing the feet encourages contraction in the muscles on the backside of the legs. We can get the best of both worlds by reaching through the heels as well as through the balls of the big toes. When standing, you can experience this simply by bringing your feet roughly parallel to each other, drawing your weight back onto your heels and pressing the balls of the big toes down into the ground. You should feel an activation in the fronts and the backside of the legs. If you pay attention, you will also feel an activation on the outside of the lower legs. The reason for this activation arises from one of the most beautiful feats of architecture in the human body.
The peroneus muscle has its belly about two-thirds of the way up the outside of the lower leg. The peroneus tendon travels from its muscle down the outside of the lower leg and cuts into the bottom of the foot just below and in front of the outer ankle. You may notice a little arch where it passes. This is the lateral arch of the foot, less pronounced than the inner or medial arch, but still visible and important for balance and stability. The peroneus tendon then traverses the foot to attach behind the ball of the big toe.
When we press through the ball of the big toe, we create a pull on the peroneus tendon. This, in turn, creates a corresponding pull on the peroneus muscle. The muscle, like a rubber band, becomes more taught and comes closer to the fibula bone on the outside of the lower leg. This activation in the peroneus muscle creates more pull on the peroneus tendon, lifting it up into the bottom of the foot and thus creating a lift in the arches of the feet. Therefore, and though it may seem counterintuitive, applying pressure into the balls of the big toes facilitates a chain reaction that helps to lift the arches of the feet.
When the feet are not on the ground, such as in a seated forward bend or a head stand, we can still activate this chain reaction by reaching through the heels as well as through the balls of the big toes. You can think of it as trying to point the balls of the big toes without allowing the Achilles tendons behind the ankles to shorten. As a result, you will feel a supportive and stabilizing activation in the calf muscles on the backside of the lower legs, as well as in the muscles on the front and outside of the lower legs.
Reaching through the balls of the big toes without shortening the backside of the ankles also turns the thighs slightly in towards each other. This turning inwards can feel very pleasant, as it can create a sense of wide spaciousness across the back of the pelvis, easing pressure on the sacroiliac (SI) joints. These SI joints, where the ilium bones that form the sides of the pelvis meet the sacrum at the back of the pelvis, often receive undue pressure, as the posterior ilium partially covers the sacrum, leaving very little space in the joint. Reaching through the balls of the big toes can relieve this pressure by turning the thighs slightly in towards each other and facilitating a sense of widening between the posterior ilium bones.
Reaching through the balls of the big toes can also encourage relaxation of the anal sphincter and the gluteus maximus muscles of the buttocks. When the anal sphincter and gluteus maximus muscles relax, it is easier to tilt the pelvis posteriorly by reaching the sit bones and tailbone towards the knees, which in turn lengthens and stabilizes the lower back. Due to this easing of pressure on the SI joints and the lengthening and stabilization of the lower back, our first principle action of reaching or pressing through the balls of the big toes can help alleviate discomfort for those who suffer from pain in the SI joints or in the lower back – or both.
However, pressing through the balls of the big toes can also bring the knees towards each other. For those who tend to be bow-legged, this can even be therapeutic and corrective. However, for those who tend to be knock-kneed, as well as for every body in poses that may pressure the knee to fall medially of the ankle (such as the front knee in warrior II, triangle and side angle, or both knees in the wide-legged standing forward fold), we must balance it with its oppositional action: lifting the inner thighs up and away from each other.
Principle II: Lift the Inner Thighs Up and Away from Each Other
In order to create spaciousness, strength and balance in the body, we must work in opposite pairs of actions, pulling away from each other to increase both mobility and stability. If we consider pressing the balls of the big toes into the ground to be striking roots, think of lifting the inner thighs up and away from each other as spreading wings. Without losing the activation that we created in the outside of the lower legs, as well as in the front and backsides, lifting the inner thighs up and away from each other brings the inside of the legs into involvement and complements the action at the ball of the big toe in activating the whole lower leg and foot.
When we lift the inner thighs and pull them apart, we perform abduction, which means to take away from the midline. Therefore, we also activate the abductor muscles on the outside of the thighs and the sides of the buttocks. In addition, as we lift and abduct the thighs, the inner arches of the feet will rise up even more, away from the anchor that we created by pressing through the balls of the big toes. The foot becomes very efficient and supportive, since arches comprise some of the most stable architectural structures.
Pada Bandha
When we thus improve the structure of the inner arch, the foot functions like a suction cup, accommodating the free flow of energy up the inner legs into the root of the torso at the pelvic floor, as we will discuss in Part III: The Subtle Body. Taken together, the first and second principle actions create pada bandha, the best and most proper way to use the feet, as well as the muscles in the lower leg that affect the feet, both in yoga asana and in any active physical gesture. In fact, each of the three following pairs of oppositional principle actions will also create a bandha. For now, think of bandhas as the stable arches or diaphragms that result from these composite pairs of oppositional actions and help direct the flow of vital energy in the body, as well as creating effortless stability in the musculoskeletal structure.
One posture that can help us feel the action of lifting the inner thighs up and away from each other more clearly is the wide-legged standing forward fold. Take a moderately wide-legged position, in which you can still keep the outer edges of the feet parallel to each other and the inner arches of the feet actively lifted. Place your hands or fingers on the ground or on a prop such as a yoga block under your shoulders. Bring your pelvic directly between your two feet, neither leaning too far forward in front of the ankles nor back behind them. Keep your heels firmly anchored as you press the balls of your big toes into the ground without gripping the ground with the toes themselves. You should feel an activation in the outside of the lower legs, at the peroneus muscle.
Now try relaxing the thighs and letting the inner thighs hang passively inwards. You might find that the inner arches of the feet collapse, and might feel pressure on the inner knees. The pose will likely feel less stable and less energized. Then actively lift the inner thighs up towards the groin and press them away from each other, towards the outer thighs. You can even tap the inner thighs with your hands to make sure you can feel them turn on. If you observe the inner arches of the feet as you lift the inner thighs up and apart, you will likely see the arches lift and strengthen up as well. The lower body as a whole should feel more stable and anchored, and the knees more supported and safe. You may also find your ability to bend forward and down increased, perhaps quite significantly. All these are the gifts of the first pair of principle actions.
Of course, as within each of the principle action pairs, it is important to find the right balance between the two opposing actions for every body in each physical gesture. As we saw in our discussion of Principle I, pressing the balls of the big toes into the ground or into an imaginary wall encourages inner rotation of the thighs and can help relieve pressure on the lower back and SI joints, especially for those who tend to be bow-legged. Lifting the inner thighs up and away from each other, on the other hand, can encourage and support turning the thighs out and away from each other. This outward rotation can help balance out the tendency towards inner rotation of the thighs from the first principle action in the balls of the big toes. As mentioned above, it can also help support and protect the inner knees from undue pressure for those who tend to be knock-kneed, and for every body in gestures that may pressure the knee to fall medially of the ankle.
Our task now becomes finding the correct balance between the first two oppositional principle actions for each body in each gesture, every time. Thus we honor individual differences between bodies, as well as the unique demands of each physical gesture in general, and yoga poses in particular. You can think of each principle action as the function of an analog equalizer dial, one that you can adjust to any intensity on a scale of 1 to 10. In simple standing posture, or in the mountain pose in yoga, one body may need to turn the Principle I knob to 7, and the Principle II knob to 4. Another body could need the exact opposite arrangement, turn the Principle I knob to 4, and the Principle II knob to 7. In another physical gesture, such as a warrior pose in yoga, the position of the body when trotting on a horse, or when swimming with a breast stroke, the very same body could require an entirely different arrangement of intensity between the two principle actions. The key is to find the right balance between the two actions for each body in each gesture, every time.
Take the warrior II pose in yoga, for example. From a wide-legged position, keep one foot parallel to the edge of your mat (or to a real or imaginary wall), while the other foot (which will now become your front foot) out 90 degrees, so that it becomes perpendicular to the same wall or edge of the mat. Bend the front knee directly on top of the front ankle and, keeping the inner arch of the back foot actively lifting upwards, bring the hip points (ASIS) level with each other. In order to do so, you may need to draw the back thigh towards the hamstring, bringing the back hip in line with the back ankle instead of the back toes – an action that we will discuss in the next pair of principle actions. Once the back hip is in line with the back ankle, behind the back toes, there will be less pressure on the tissue directly in front of the back hip point, and you should be able to lower the back hip towards the front heel without losing the lift in the inner arch of the back foot.
However, if you now look at the front knee, you may find that this pulling back of the back hip has challenged the ability of the front knee to remain directly above the front ankle. The front knee may now be collapsing inwards of the front ankle, placing undue pressure on the inner knee. This is when we may best cue Principle II with more emphasis on its tendency to support an outward rotation of the thigh. We might think or say something like: spiral from the inner knee to the outer hip. This will activate the inner thigh up and outwards, encouraging the knee to stabilize above the front ankle, and thus supporting and protecting the inner knee.
It is also helpful to notice that this greater demand for Principle II that the warrior II pose places on the front leg actually also increases, rather than decreases, the demand for Principle I. Try applying no downward pressure into the ball of the front big toe as you spiral the front thigh from the inner knee to the outer hip. Compare that to actually applying more pressure down through the ball of the front big toe as you spiral the front thigh out, and you should find that the latter approach proves significantly more effective than the former. The two opposing principles in the first pair of principle actions (as indeed in each of the pairs) actually support and enhance each other through their productive opposition or antagonism. In this sense, we may visualize the pairs of principle actions as cog wheels spinning against each other. The more you spin one, the more you can spin the other, and the more energy you generate.
As you continue to spiral your attention between the two opposing actions in this first pair of principles in each and every physical gesture, you should find increased stability, mobility and stamina. Over time, you may find that you can attain these positive qualities with less and less effort. You might discover that you can support the body with less effort on the principle action from which a given gesture demands more effort. Perhaps a gesture that required turning the Principle I dial to 4 and the Principle II dial to 7, now requires only a 6 or a 5 from the Principe II action. This will mean that you are beginning to bring the structure of the body into better balance within itself.
Once you have equalized the oppositional actions within a principle pair for your body in a given gesture at a given time, you can improve the gesture even more by finding the lowest degree of intensity in both actions that still balances and supports the body properly in the gesture. For instance, the only thing better than finding the right balance for your body in a given pose by turning the knobs to, say, 4 and 7, is to be able to support the body equally well in the gesture at an intensity of 3 and 6, 2 and 5, and so on. If, over time, you find the right balance at 2 and 4, or even 2 and 3, and so on – all the better. In other words, the best balance of effort for your body in a given gesture at a given time will involve the least effort necessary in and between each gesture that still supports the structure and energy flow of the body in the gesture. The only thing better than going more deeply, safely and with more effort is going more deeply, safely – and with less effort.
Principle III: Press the Upper Thighs Back Towards the Hamstrings
Now that we have properly activated the feet, the lower legs and the inner and outer thighs, we turn our attention with the next pair of principles to completing the activation in the core of the body. We will add action in the front of the thighs, the hamstrings at the back of the thighs, the pelvic floor, and the muscles of the abdomen and lower back. For the first principle action in this next pair of opposing actions in the upper legs and core, and the third principle overall, we now press the upper thighs back, towards the hamstring muscles at the back of the thighs.
If we observe most people from a profile view, we find that we tend to stand with the hips forward of the ankles. This posture tendency compresses the lower back and the SI joints. It presses the tops of the thigh bones forward, towards the front of the hip sockets, which limits pelvic mobility. We have seen how the first principle action of pressing through the heels and the balls of the big toes encourages inward rotation in the thighs and can thus help relieve pressure on the SI joints and the lower back. Now, as we press the upper thighs back towards the hamstrings, we create even more space in the lower back, as well as in the hip sockets. By drawing the tops of thigh bones away from the front of the hip sockets, we also facilitate pelvic mobility in all planes of movement.
One easy way to see the effects of simply drawing the tops of the thigh bones away from the front of the hip sockets is to stand with the feet parallel at the width of the hip point and look down until you can see the tops of your feet, or even the front of your ankles. Most people will feel here that they are sticking the buttocks far out behind the ankles, but if we observe them from the side, we will see that the center of the hip is now directly above the center of the ankle, and that the legs are vertically straight.
The easiest position in which to feel the effects of drawing the tops of the thigh bones back is in the downward facing dog pose. From a plank pose, or the top of a push-up position, lift the thighs up and back until the body is in a long inverted V shape, with the hips at the highest point in the V and the head hanging between the extended arms. Instead of pressing your chest down towards the ground by arching the back (a common mistake in this pose), keep the spine straight and widen the shoulder blades apart. Now you will find that pulling the upper thighs back stretches the spine longer, without arching the back. The action in the upper thighs open the hips, allowing more bending at the hips. Then the head and chest come closer to the ground as a result of this increased hip flexibility, without compressing any part of the spine or tightening the shoulders. If you now relax the action at the upper thighs, you will find that the weight shifts forward onto the hands, placing undue pressure on the wrists, elbows and shoulders. Pulling the upper thighs back shifts the weight more onto the feet, lengthens the spines and opens both the hips and the shoulders.
If the lower back rounds upwards during downward facing dog, it is precisely this third principle action of pulling the upper thighs back that will help lengthen it – though it is still important to activate the abdominal muscles as well. For those whose lower back arches downwards in the downward facing dog pose, however, pulling the upper thighs back needs to be balanced more actively with its opposing action, the next principle action and the second action in this second pair: lifting the lower belly.
Principle IV: Lift the Lower Belly
Go back to a simple standing position and look down until you can see the top of your feet again. As we have seen, this action will passively place the pelvis directly above the ankles and position the legs more vertically from the ground. Now, without allowing the pelvis to come forward again, lift the lower belly to bring the torso back upright. You can even reach the sit bones slightly down towards the back of the knees in order to trigger this core activation in the abdominal muscles. Drawing the body thus into its full height, you might now feel that, though perhaps unfamiliar, this posture is tall, strong and grounded. You might feel the weight more evenly distributed across the bottom of your feet, even if the unfamiliar position challenges your balance at first. Perhaps most importantly, you may find that there is more space in your body for the lungs to expand, allowing for a deeper breath with less effort.
When we keep the pelvis from coming forward as we draw the torso upright, we are applying the third principle, pulling the upper thighs back. Then we balance the action and lengthen the lower back as we lift the lower belly and send the sit bones slightly down towards the back of the knees. The negotiation between these two principle action comprises precisely the productive opposition or antagonism with which this second pair of principles helps to both stabilize and mobilize the pelvis and the lower back. If we just keep the upper thighs back as we bring the torso upright in standing, we create compression in the lower back. This is especially obvious for those of us who tend to have a swayback (hyper-lordosis). If, on the other hand, we actively lift the lower belly in standing, but allow the upper thighs to rest forward in the hip sockets, this also compresses the lower back. This, in turn, will be most obvious for those of us who tend to have a flat or rounded lower back (hypo-lordosis). In every case, finding the right balance within this second pair of principle actions for each body in each gesture creates the best stability and allows the greatest mobility.
Recall here the analog equalizer knobs from the first pair of principle actions. Here as well, one body may come to perfect balance by turning the intensity of drawing the upper thighs back to a 4 and that of lifting the lower belly to a 7. Another body in the very same position will need a different or even the opposite balance of intensity for ideal posture.
Also, just as with the first pair, different physical gestures will require more of one or the other action even in the same body. In any supine backbend, such as the bridge or wheel pose, gravity will assist in drawing the tops of the thighs back towards the hamstrings, so that we will generally need to apply it with less intensity. In fact, relaxing the thighs will best allow gravity to pull the upper thighs away from the front of the hips sockets, resulting in deeper relaxation as well as better posture.
However, the same supine backbends require us to place significantly more effort and intensity onto the fourth principle. Here we may think of it less as lifting the lower belly, since we mean to pull the lower belly towards the middle back, and in a supine position this is more of a drawing back and down then a lift, per se. Yet, as we saw in simple standing as well, the same internal action can result from reaching the sit bones towards the back of the knees. In a supine back bend like bridge or wheel, unlike in simple standing, there is no danger of overdoing this posterior pelvic tilt action, and so we can emphasize reaching the sit bones towards the back of the knees as strongly as we wish. The result will be the most important benefit of the fourth principle action: lengthening and stabilizing the lower back by contracting the hamstrings and properly activating the abdominal muscles.
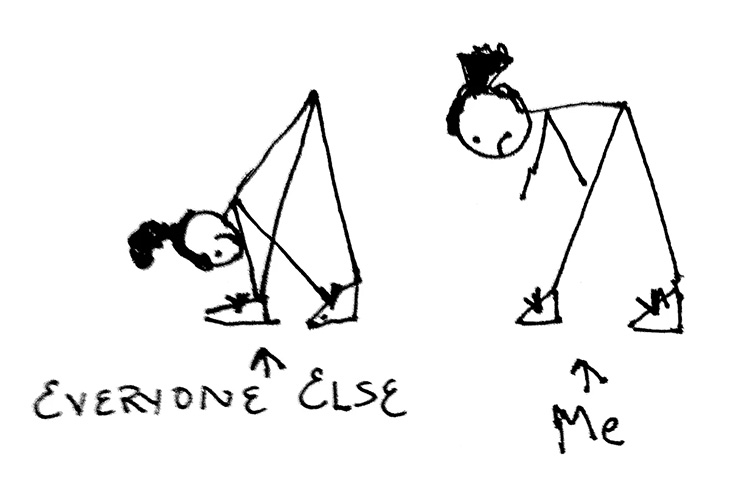
The standing forward bend (uttanasana) requires more skill and body awareness in order to feel the effects of this second pair of principle actions, yet the effect of balancing the two opposing actions in the upper thighs and lower belly on this gesture proves profound, if we can find it. Bend forward and place your fingers or palms on the ground or a prop in front of your feet. Lean your pelvis forward until you feel the weight on the balls of the feet, without gripping the ground with the toes or lifting the heels. If you cannot unbend your knees, elevate the prop in front of your feet more. Instead of lifting the sit bones (a most common mistake in this pose), actively lift the lower belly and reach the sit bones down towards the back of the knees. You may already find that you can bend more deeply, with less effort and an easier breath. This is a gift of the fourth principle action.
Now, keep your pelvis forward above your feet and do not let it move behind your ankles as you press your upper thighs back towards the hamstrings. This is an internal action that may not look like much from the outside. Yet, if you can activate the quadriceps muscles at the front of the thighs such that the tops of the thighs draw back away from the front of the hip sockets, you will find even more room to bend forward and down – again, with less effort and an easier breath. This is the gift of the third principle action.
If your flexibility allows, take hold of the back of your ankles with your hands. Refrain from pulling up with your hands (another common mistake in this gesture). Instead, use your hands to press the ankles down towards the ground. You may now find that your ability to lift the lower belly improves, and that the pose deepens even more without overexertion or limiting the breath. Now, if you are able, take hold of the big toes with the index and middle fingers below the big toes and the thumbs above them. Again refrain from the same mistake of pulling up with your hands. Instead, squeeze the big toes between the fingers and thumbs and pull them forward, parallel to and across the ground in front of you. You may now find that you can better press the upper thighs back within the hip sockets, without moving the pelvis back behind the ankles. Here as well the pose will deepen without overexertion or limiting the breath. Balancing these two internal actions gives every body the most flexibility and mobility in each gesture.
With time, just as with the first principle pair, proper application in yoga gestures and other physical gestures will improve the balance of the body. The disparity in demand for intensity between the two actions will diminish, and we will be able to achieve optimal stability and mobility with minimum effort. Again, this is like turning both equalizer knobs down without losing the quality of the gesture. As we have seen, the only thing better than going more deeply, safely and with more effort is going more deeply, safely and with less effort.
Mula Bandha
Taken together, the third and fourth principle actions create mula bandha, a stable and supportive arch at the pelvic floor, between the genitals and the anus. As with all bandhas, we do best to encourage and receive Mula bandha as the result of principle actions, rather than by actively forcing a lift in the pelvic floor. As we will see in Part III: The Subtle Body, the pelvic floor is the root of the central energy channel of the body, and creating unnecessary tension here proves more disruptive than supportive for the flow of vital energy.
Physiologically, the more subtly arching lift of the pelvic floor that results from the second pair of principle actions provides perfectly adequate stability for the pelvis without encouraging unnecessary contraction in the anus. Contracting the anus during physical effort tends to limit our capacity to perform the fourth principle action of lifting the lower belly, as it restricts the ability of the pelvis to tilt back. Contracting the anus physically limits our ability to send the tailbone down towards the back of the knees. Since the tail is connected to the sacrum, which is part of the pelvic bowl that includes the sit bones, limiting our ability to point the tailbone down will also limit our ability to reach the sit bones down towards the back of the knees. This, in turn, restricts our capacity to lengthen and stabilize the lower back, and thus diminishes the quality of every physical gesture.
Instead of actively lifting the pelvic floor, therefore, we can best enjoy the benefits of mula bandha as the result of pulling the upper thighs back and lifting the lower belly. This supportive but supple lift at the root of the torso effortlessly supports the pelvis and provides the foundation for the principle actions in the upper body. We can recognize this as the culmination of the two pairs of principle actions in the lower body, as we begin to explore the next two pairs of principles.
